
The workshop has been lacking a flexible strop for some time now. A project came up that required one, so I thought it high time to knock one out. For any unfamiliar, a strop is used to polish the surface of a cutting edge after the last abrasive cutting stone. They are traditionally, and most commonly, made from leather; although a variety of other soft materials can be used: denim or canvas for example.
This one will be leather which I picked up as a scrap from a local saddle maker / leather worker. He was keen for a bit of a chat and we ended up discussing various polishing compounds which was interesting. For stropping he uses and recommended fine iron filings on the suede (flesh) side and preferred jeweler’s rouge on smooth (grain) side. Man likes his effee-ohtwo I guess. Can’t argue with him as all of the tools out were razor honed.
Back on point though; this strop will be made as a hanging or ‘barber’s’ style strop. This format has two essential parts;
1. Something to hang with
2. Something to hang off
Top of the list, item one (1), is usually a riveted or clasped loop fixed to one end of the strop. It is often quite decorative with a brass, chrome or nickel finish. This is going to be a bit of a homebrew job so I’m just going to set a yellow-zinc grommet into the end.
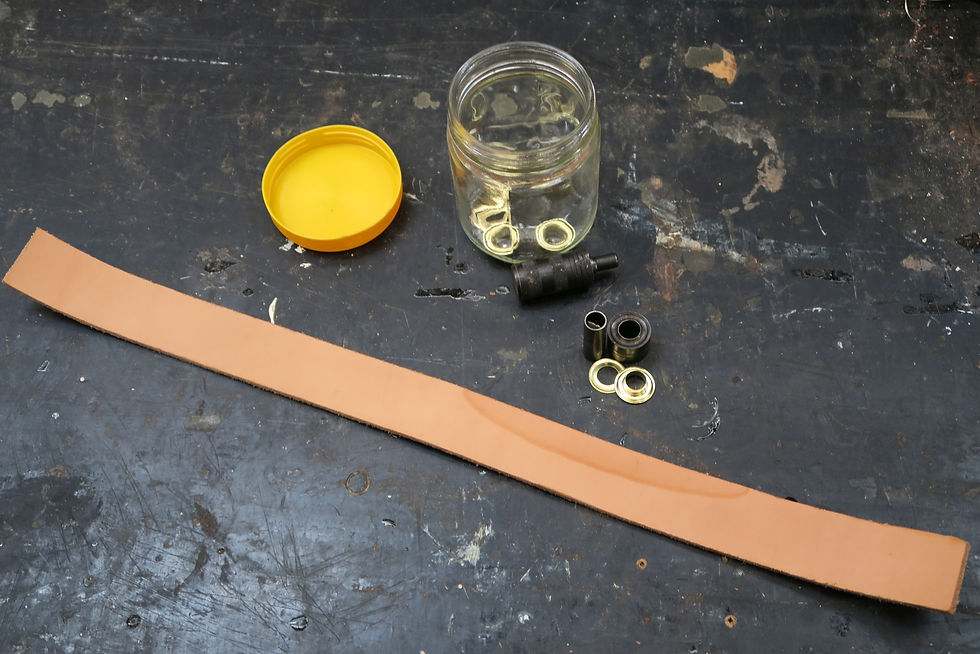
The leather strip with the eyelet setting gear in a quintessentially Australian storage vessel; the Vegemite jar.
This kit has the whole shooting match; grommets & washers, a wad punch, a mandrel and an anvil. The wad punch is used to make a clearance hole for the grommet through the material with the washer placed on the opposing side. This is put onto the mandrel and the anvil is struck with the knockometer to set the grommet in place. Once everything is fixed in, a sharp chisel is used to round the end for a simple end treatment, adding a bit of aesthetic appeal.


Tap here, cut there and item one in the bank.
Moving onto requirement two (2); something to hang off; this is going to be a turned handle. Having a look at what was in stock, I tracked down an old piece of framing pulled out of my place during some renovations. This I'm guessing would most likely have been an old bottom or top plate from some wall framing. I’d say the visible check-out would have housed a wall stud. Very strong joint but labour intensive. Not likely to see similar building construction methods these days.

I end up keeping the offcut's offcuts until there is only a saw kerf of material left
A turning blank is cut out of this stick to suit the handle. The strip of leather is about 45mm (1 12/16”) wide and the plate was an old 3”x2” so there’s plenty of material. The handle is going to have a squared end with a rebate to accept the leather, transitioning to the turned handle finishing with a flare out at the butt. Firstly, get the piece squared and true (enough), mark out the transition point and toss it onto the lathe. Because of the size and shape of the blank, I’m opting to use a spur drive on the lathe opposite a live centre. It could be chucked but the blank I cut is too short for that so spur it is.

You spin me 'round
Unfortunately, it takes two hands to use the turning tools safely and I’m just not reckless enough to cowboy it with one hand cutting and one hand operating the camera; so no action shots of shavings flying I’m afraid. The process here is pretty simple; spin wood, cut wood. The pencil marked transition on the blank shows up quite clearly once the lathe is moving so the first cut will be at the transition. This timber, (spotted gum I’d say) is a little bit splitty and the grains are interlocking; there is potential for really bad tearout if we go with a hell for leather cutting approach. Using the marked line as the centre of the transition, a diagonally deeper cut is used to maintain the square edge at the top while working down to a cylindrical barrel. Depth the main handle at both ends then turn it round.


The blank has now been roughed to an approximate proto-handle. With a pencil, the high & low points of the handle contour are marked onto the blank. Use a 2B pencil here; the graphite is softer and blacker than a standard HB pencil. This will transfer with less effort and be easier to see, without scoring the surface. Set an outside calliper to the desired dimension of the marked points and turn the lines down to size using the calliper as a feeler gauge; this can be done carefully with the lathe still spinning. I have also found it’s better to have individual callipers set for each dimension to save having to set/reset them at the lathe. Less thinking about this here means less errors. It’s really easy to remove the material; much harder getting it back on. With the parts depthed, join the dots basically. The handle inherent in this piece finally begins to emerge; forty years after first being put to task and probably over a century since being a sapling.


The shape can now get further refined. The strop end is still square, and this is fine, but will look really bulky if left this way. The piece is taken out and two opposing faces are cut down with a saw to create a rectangular shape that will look the part once assembled. Toss it back on the lathe and turn it some more until the refined and finished shape of the handle has surfaced. A light sanding of the shape upto 400 grit in the lathe puts it near completion.


Clamping this handle in a vice would be pretty difficult so the last bits of shaping and edging at the rectangular end are just done straight on the lathe. Held between centres, the handle is in there snug; so take advantage of that. The flat faces are scraped to clean them up and a spokeshave is used to radius the corners. Some final hand sanding with the grain in 400 grit gets this handle ready for finish.


The piece will try to rotate a little while tooling but still makes the process pretty easy & simple
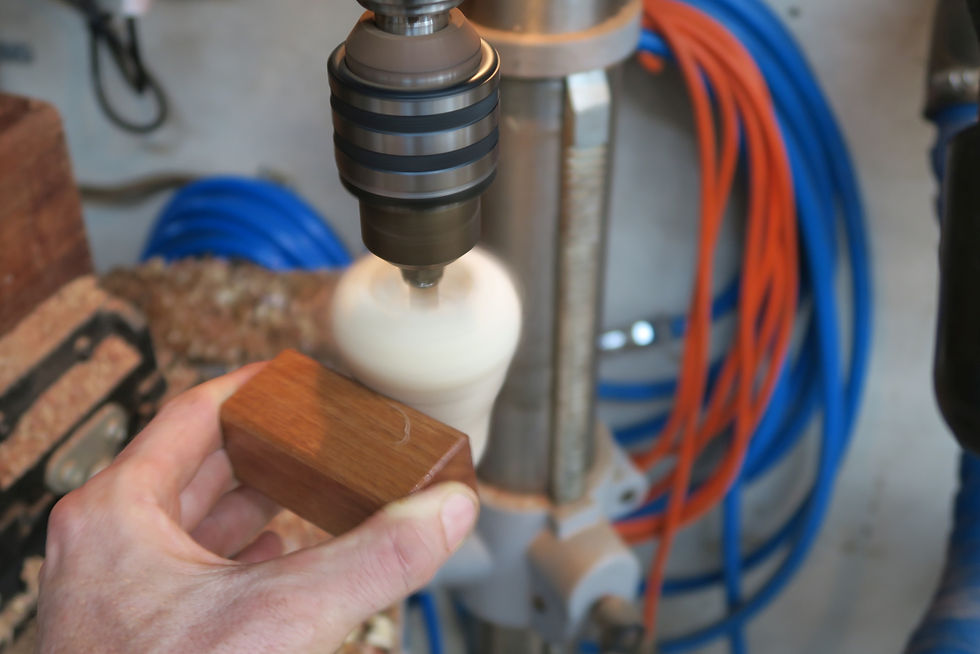
To finish this off I’ll be using a touch of my old mate. It’s a beeswax/mineral oil blend and for an (almost) instant and effective finish. It’s not a super-heavy-duty choice but this isn’t a frequent use object, so it should last years before requiring renewal. Application is pretty simple; spin the lathe and rub the puck across the surface until the piece is fully covered then let the oil soak for a little while. I like to allow 10-15 minutes. Take a clean cotton or linen rag, white preferably, and with the lathe spinning at high speed, run this slowly back across the surface. The surface appearance will change from matte to satin and it’s done.


Lightly press the finish across the surface until coated. A firmer pressure with the rag will polish it right up
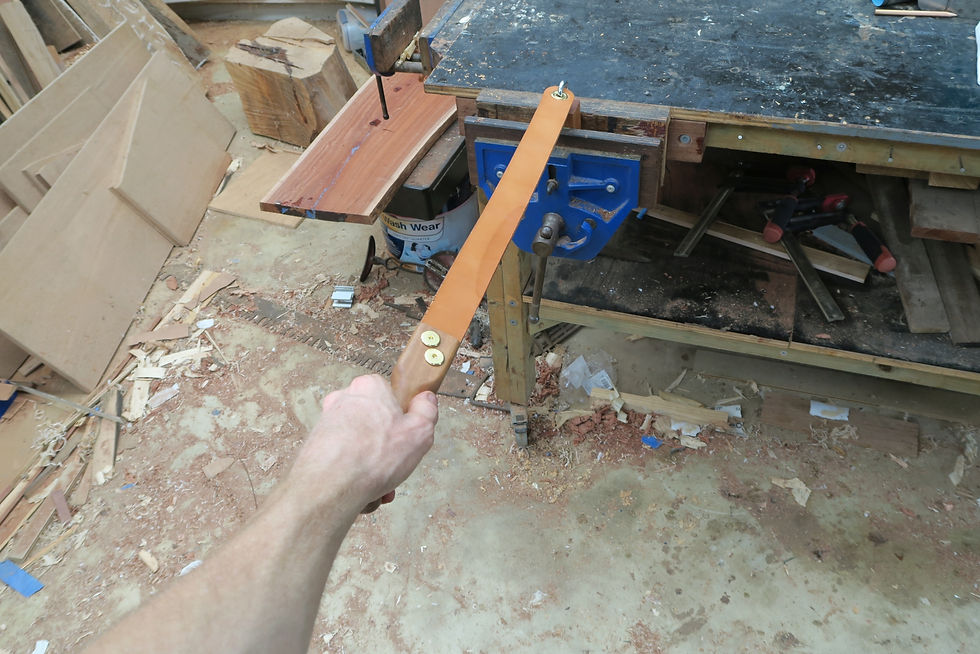
All that’s left is to join the thing to the thing and make something to hang the thing; simple right? To mate the two parts a slot is made at the head of the handle to accept the leather. Connector bolts and cap nuts will then be used to sandwich the leather in place. It will be a tight but releasable join; so that the leather can get replaced in the future. Mark and pre-drill everything carefully and use brad-point drills to avoid tearout. Take note of the grain direction for the slot. This particular piece of timber has a rift-sawn pattern, meaning the annular rings visible at the end grain run diagonally across this facet; in this case, at the optimal 45°. This works great for the application and is a really stable cut.
The grain orientation is important here because the compressive introduced by clamping will be acting along the fault direction of the timber. Were this slot to separate the growth rings in parallel, splitting could be possible at the internal edges of the slot. Drill the bottom of the slot through, then cut down so there is a rounded end here. This will not only be the easiest method to remove the material; it will also better mitigate the stress concentrations when the clamping compression is applied. Square corners here would create very acute stress risers. One extra thing; lightly sand the loose fur off the inside of the slot but leave the faces rough from the sawing. This will add additional friction with the clamping for a better hold.


Pictured right: growth rings are visible 'rising' from lower left to top right at about 45°.The centre of this tree looks to have been leftwards and slightly diagonally upwards from the top left corner of the handle end.
Lastly, something to hang the thing off. Pretty low-tech solution here; a block with a hook that goes in the vice. I had some coach eye bolts on hand so one was nipped into a hook and fitted into a small block that was an offcut from the main blank. Similar finish was applied for this but a leaner blend I use for hand application on cutting boards. This coating will be less hardy than the handle one but again, this block will be used in-frequently and gripped even less than the handle. Apply the finish and, as before, let it sit for a bit. The surface then needs to be burnished. This can be done by hand but I prefer using the drill press with a shaped calico polisher.
Work smarter not harder
The block only worked using the end grains to fit the hook so the pre-drill sizing had to be spot on to avoid splitting when the hook is screwed home. When fitting screw hardware to hard timbers, add some grease or oil to the threads for lubrication. It will make it go in easier and, particularly if the timber is green, should allow for later removal if needed. Start the threads by hand than use a shifting spanner to screw it home.


I already had the oil/wax finish out so it doubled pretty well as a lubricant
And voila, there you have it. My absolutely filthy workshop … and the strop. Maybe I need to sharpen my act up aswell and get some clean into the place.
Kind Regards,
Walker
March 2021
If you enjoyed this article why not stay up to date with all the latest from Timber Tone. Click here to subscribe so you never miss a post or video.
Comments