Encouragement for this project came from my brother-in-law; who’s currently renovating a Queenslander cottage built in the 1880s. Like basically all construction sites, there’s a bit of gear lying around. He tossed a tortilla press together with some old boards pulled from the building and was pleased with how the thing worked. I got a couple of photos and a challenge.
Avago ya mug
As much as working with new timber is good, I really like using locally reclaimed hardwoods. They’re never perfect but the timber itself is always beautiful. The old growth hardwoods used until around the 80’s here were unsustainably harvested. So it’s a shame, as these buildings get renovated, repaired, or demolished; to see what really is something that should be cherished go to landfill. The piece of timber used for this project is, coincidentally, an old fascia board from another Queenslander my mate is currently renovating. I guess that’s really keeping in line with the spirit of the challenge.
A Queenslander is a particular style of house built to maximise breeze around and through the structure. Basically, they’re a stumped building with external verandahs running the perimeter to varying extents, but never fully, and a central breezeway through the building. Did I mention these buildings were endemic in Queensland?
Anyways, I only had the photos to go from, so I had to come up with a bit of a plan.
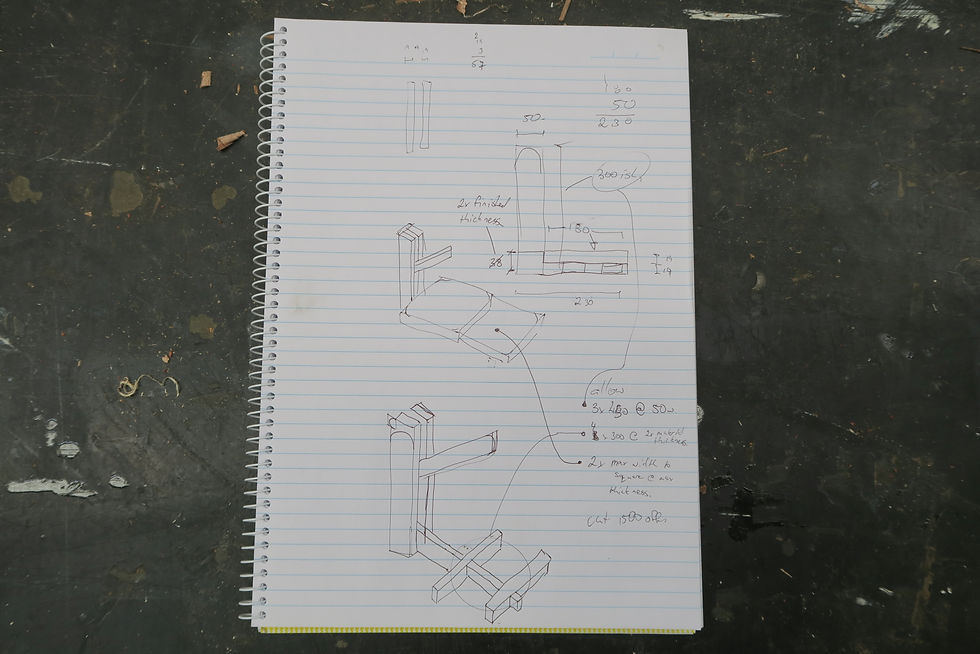
The ‘plan’. Looks like I’m shooting from the hip all day.
When using re-claimed timber, it’s important to check it carefully for any remaining metal pieces like nails, staples, clouts or screws. Coming from an old building these timbers may have multiple coats of paint and/or builders bog obscuring what’s truly lurking beneath. It is much better to take the time to check and remove the scrap metal than having to deal with a chipped plane blade or machine cutting knife. Once it’s passed the visual and metal detector inspections; remove any visible high spots or blowout from old nails. I use the slick for this; when building the thing I didn’t realise just how much I’d be reaching for it now that I’ve got it.
No treasures to be found on this hunt
As this project is going to be a press and has a moving part, the boards need to get properly dimensioned and squared. This will ensure uniformity of the faces and consistency of straightness when preparing and assembling the parts. This can be done by hand with planes but I’m expecting this timber to be super hard with at least some interlocking grain; so this would be pretty laborious. Instead, I’m using two machines, a surface planer and thickness planer; commonly called a jointer and thicknesser.
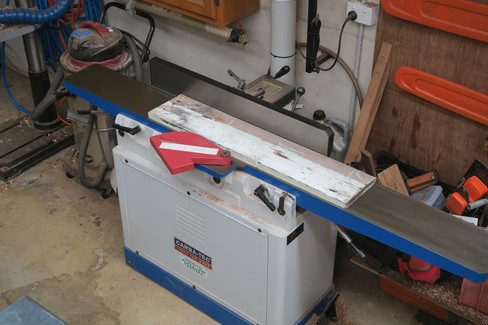
The jointer has two table beds ‘in plane’ separated by a cutting head. Boards are passed across until a true and flat surface is established. This face is then rotated onto a fence at 90° to the bed, and machined to square. I had just mostly edged the first board when the machine began to make the tell-tale grinding sound of an issue arising. Getting under the hood, revealed the motor fan had cracked around the shaft.
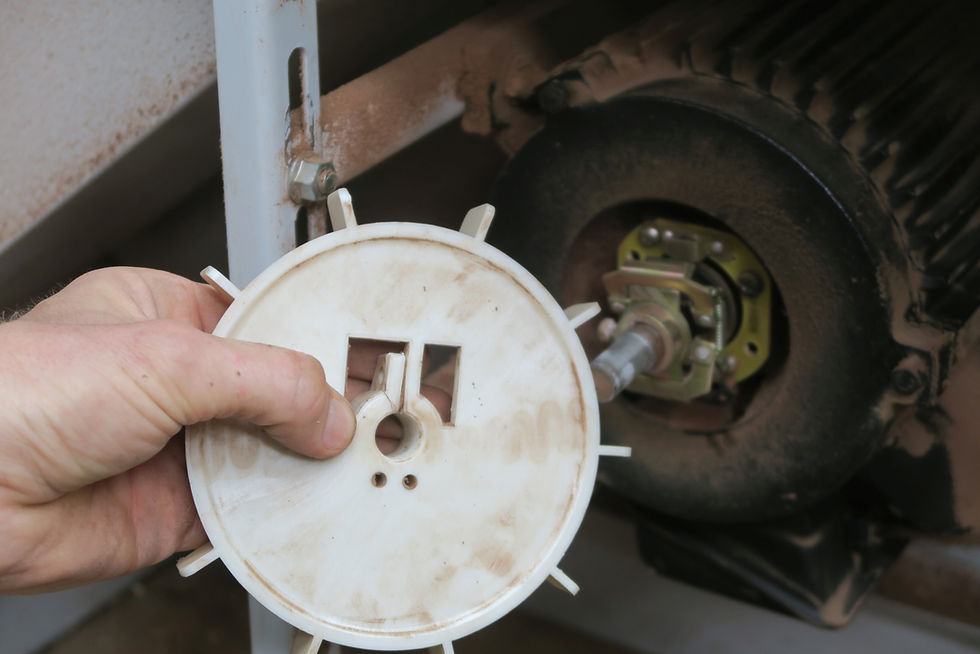
Well, tacobout throwing a spanner in the works.
I need the machine up and going to keep the wheels on this thing; so we’re going for a workshop fix. The plastic has looks like it’s gotten brittle around the shaft collar and snapped. Just tightening it further won’t get anywhere; so option B. Adhesives like epoxy may not bond the plastic and would probably crack again under compression; OK, so option C. The only real choice I had on hand was drilling and tapping some new holes into the collar itself and bolting the fan back onto the shaft. This process is simple; match the bolt thread to a tap, match the tap to a drill, drill hole, curse profusely while tapping hole, fit bolt; done, easy.
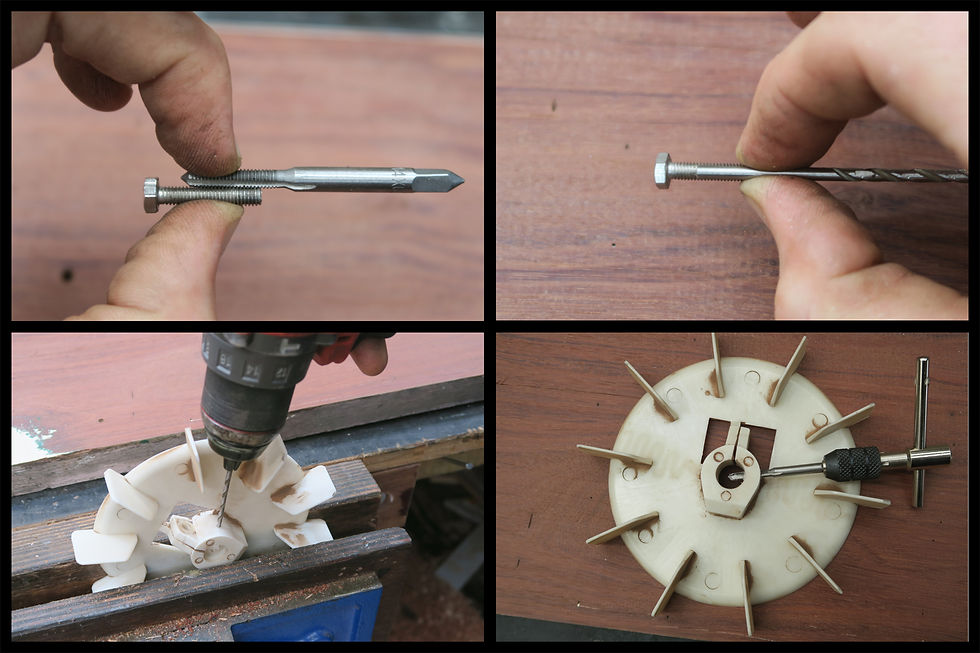
Don’t forget the cursing for step 4; this part is crucial.
All up, I tapped three holes at roughly 120° apart. I didn’t want to over-torque a single hole trying to tighten the fan back on and strip the plastic threads. The bottom bolt is marginally longer and may minutely throw the motor balance off, but I didn’t notice any real difference when testing it out. I also re-fitted the original bolt to try and keep the old clamp from breaking into pieces and getting into the rotor.
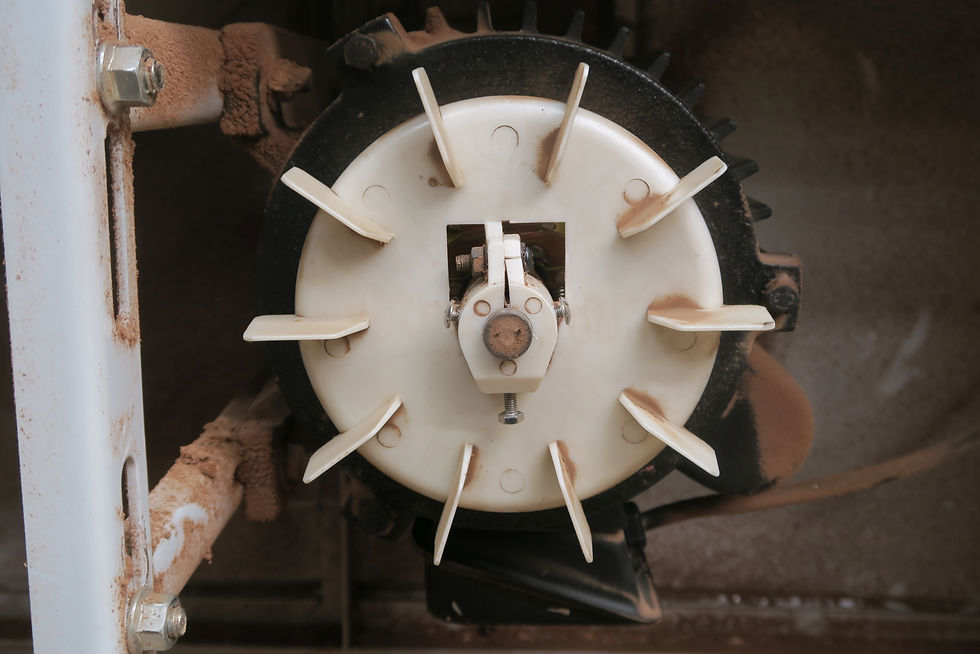
Back to it then
Now that we’re in business again, the boards can be finished on the jointer and move on to the next machine. The thicknesser has cutter-head opposing a flat table with the material passes between the two. The bed acts as a refence face for the cutter which is it’s important to have the underside of the board true; otherwise imperfections like twist and bow will be reflected onto the upper face of the board.
This machine is a real nommy boy; it’ll just eat up whatever gets thrown at it
Three of the four faces are good leaving just one edge to square up. The boards are too wide and a bit narrow (for the width) to get through the thicknesser on edge so the bandsaw makes the final cut to square the material up. Using the fence the last edge is ripped off to make a perfectly square and parallel piece.

The jointer and thicknesser both have cutting drums with skewed, helical, tungsten teeth as opposed to long straight knives; so the cuts on these faces are practically perfect. Even on material this hard, the finish straight off the machine is like glass. The bandsawn edge; not soo much. It’s by no means terrible, but there are visible cut marks along the edge. The material is pretty hard so a low angle plane is the go to dress these faces.
I wasn’t quite sure what to expect under the paint so getting some eyeballs on the timber is always good. I’d be guessing Ironbark for the species and the boards themselves are pretty clear, aside from the odd nail hole. After marking and cutting out the blanks for the press, turns out there was enough material to make a second; so why not tear another one out.
Always better to be looking at it, than looking for it I guess
With the boards now ripped into sticks, the build can progress. There are still a few more stages to complete before we can bring these presses home to mum.
Shaping, notching & housing
Hardware selection & sub-assemblies
Repairs & make good
Test fit & finish
Final assembly
These milestones aren’t discretely separate along the build progression. Some parts require working through some stages to allow other parts to commence. The list is more of a top-down view of how the thing generally moves along. Getting right down into every step at this point would bog the read down; so in the interest of getting you home before dark, we’ll keep this as more of a Cliff’s Notes version for the duration. In that context, there are three main parts to complete from here. The frame, the press and the lever handle.
First cab off the rank is the frame, so let’s kick that off. Per ‘the plan’, the frame consists of risers to hold the handle and a bed to accept the press. For neatness and better rigidity, the bed parts are cut and housed together. The central member accepting the bed and risers is also notched to finish flush with the press plates when fitted. Once made, I ended up with a gap at one of the housings of 0.6mm (0.024”). Not great, but still within tolerance. The rest were snug fit with a light hammer tap to get home.

Missed it by that much
The only real requirement for the uprights is that they are perpendicular to the bed and tall enough to catch the handle. Once cut & dressed, the individual pieces of the frame get fixed together. I really like the look of brass hardware; particularly on darker timbers. Screws would be fine for the lot, and screws are used on the underside & original; but for the exposed areas, I decided to use connector bolts and nuts. I think it gives more of a polished look aesthetically.
The fixing hardware provides all the clamp force required for the glue join
Completing the frame assembly allows the next stage to commence; looking at how the press and handle fit onto the thing. Loosely placing the parts together gives a feel for the finished product will go together. At this point, for the better part of the piece, I have also already applied edge treatments. Simple round-overs for majority and a larger bead for the main press edges.

As the uprights are rather tall I want to brace them against any future splay. In keeping with the hardware finish, they’re tied together with a brass rod. I didn’t have any rod stock on hand or readily available, so I just decided to bastardise a barrel bolt. This gets fitted across the two uprights towards the top. For neatness, they get housed partially into the timber and roundovers formed on the protruding rod.
Epoxied & screwed into place
With the frame pretty much complete let’s move onto the press. This really just comprises two plates connected by hinges, to put the dough between for squishing. I was sixes and sevens about whether to just leave them flat or build in some kind of depth stop. The example one didn’t have any depthing included and brother-in-law said it worked OK. In the end I couldn’t help myself and went to some trouble to remove material from the inside upper plate; leaving the perimeter in place to act as a stop.
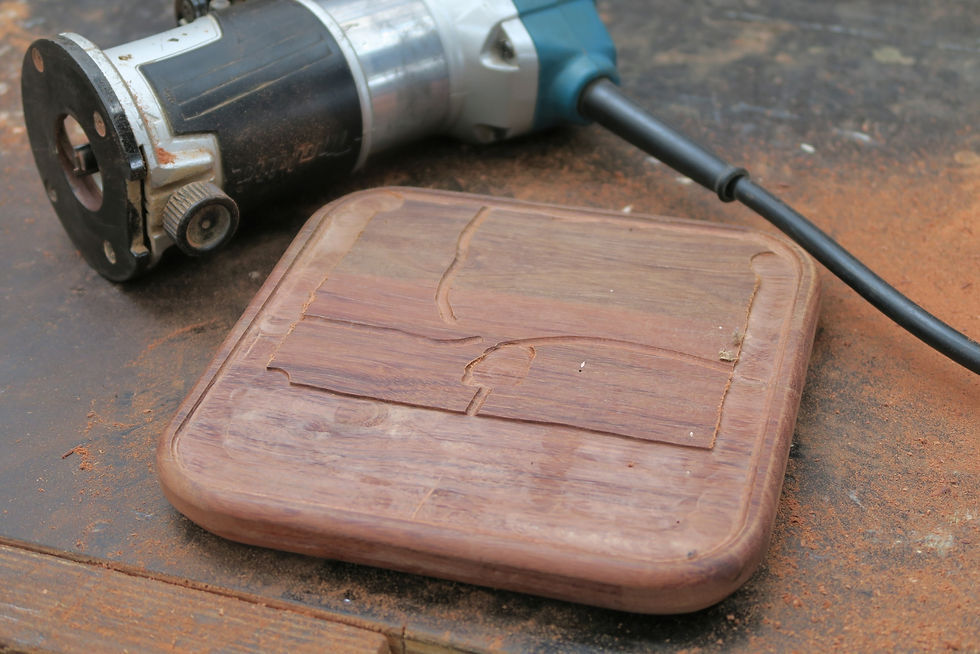
About 1/16” removed
Getting this done ended up being a little trickier than I had initially thought. It took a little bit of thinking out the process before coming to something I was happy with that would work. It ended up entailing using the router table to make the edge cuts, then cutting the rest by hand. After scraping the tool marks off, it actually ended up a little deep at about 1.8mm; so we’re a bit off spec there.
To articulate the press; hinges and a handle are needed. The hinges will be fitted to the outside edges of the plates so at this point; I had to make a decision on which way to orientate the grain. Longways in line with the uprights, or crossways perpendicular to the uprights. Longways puts the grain in a stronger orientation for pressing the dough while leaving the hinges to be fitted into the endgrain. Crossways provides a better edge for the hinge fixing but weaker aspect for the dough press. In the end I decided to go with crossways and move the handle slightly towards the middle of the press to reduce the stress on the press lid.
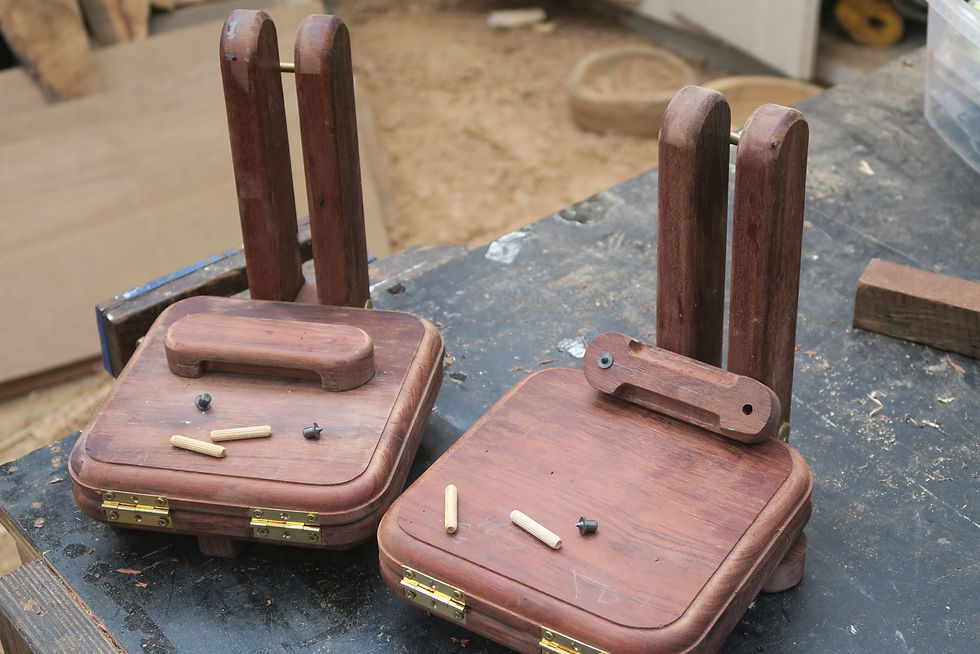
Hinges morticed & handles doweled into position
Lastly, the lever handle fitted gets fitted. I ended up deciding to finish this square across the top of the lid handle. To help things run a little more smoothly, I also reduced the lever handle thickness by the thickness of two brass washers. These are placed either side of the lever to stop any scrubbing between the handle and the uprights. For the pivot point, I opted for just another connector screw. I thought about bushing the hole in the handle for some reinforcement, but ultimately scrapped this idea. The timber is already really hard so should be pretty resilient. If slop does start accumulating here, it can always be removed and bushed after the fact.
The handle needs to be relieved over the cross tie at the top so it wouldn’t fall down when opening the press. I also here decided that I wasn’t 100% happy with the grip so this shape was refined more; this did make it feel a lot more comfortable to hold and use.
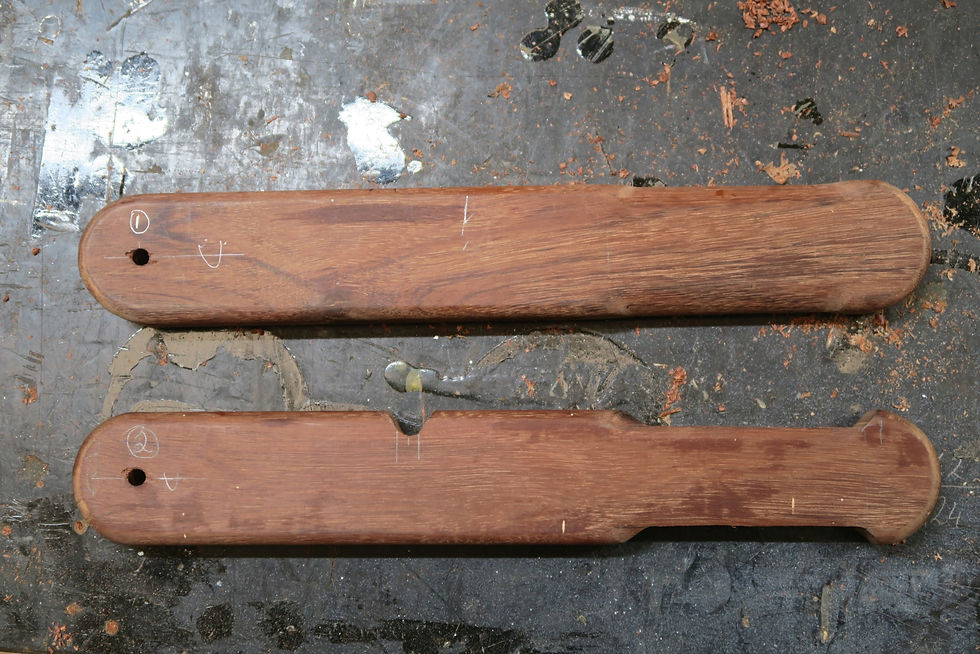
Get a grip on it mate
I mentioned earlier that part of the build process requires making good, this project was no exception. The timber already had a few areas that required attention and over the course of the work I had a few tearouts and chipouts to deal with. As the timber was so hard, I also sheared a couple of screws getting the thing together. One I was able to extract while the other, I had to live with but was able to hide behind the hinge with another screw skewed in. Glue & epoxy sorted out the tearouts and chipouts.
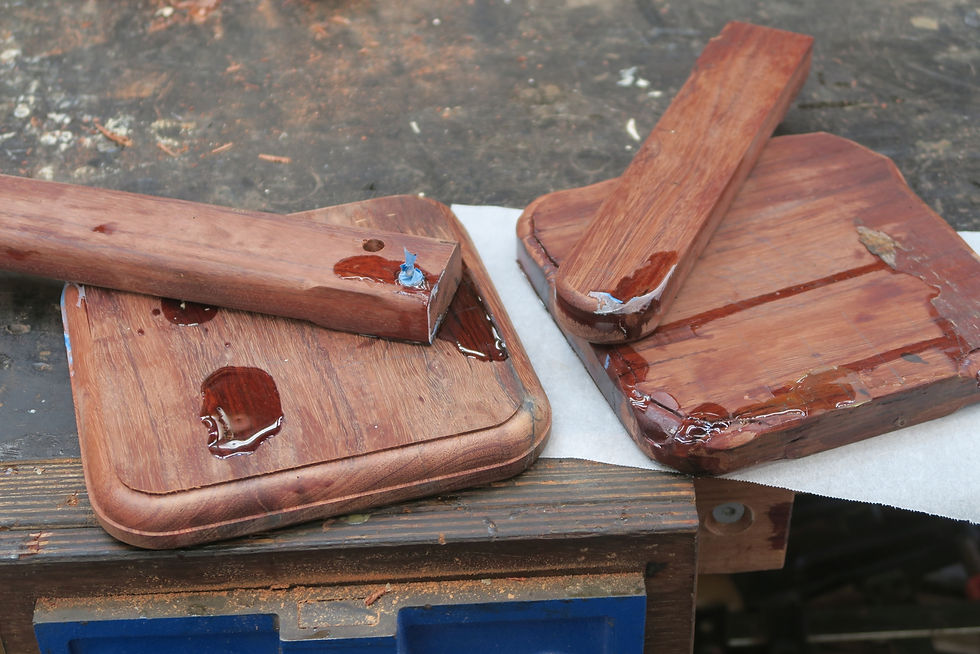
Just getting jalapeno mistakes here
Finally, to the fit and finish part of the build. Last steps before the finish goes on are disassembling the parts and getting a maker’s mark somewhere. Front and centre seems like a good place so let’s fire the iron up and get branding. Trying to get the photos lined up and shot, allowed the iron to cool down some. This resulted in me dicking up the mark on the second press.

Guess that one’s mine hey?
Onto the finishing. As this is getting handled around food, I’m going to use my normal cutting board finish blend as part of a two-step process. Firstly, the parts get a generous coating of mineral oil. Some areas will accept the oil more readily so keep it up to them. I like to use a baby oil bottle for application to meter it out, as they normally come with a little squirt hole that creates a nice flow. Let it sit for a short while, 10-15 mins, then wipe off any excess. Allow that to sit for around another ten minutes or so.
The pieces will take on a satin look and still be slightly wet to the touch. Apply a reasonable coat of the blended finish all over and let sit for around another 10 minutes. Again, wipe off any excess and it’s time to burnish. This can be done by hand but it’s a lot faster and easier with a machine; I like to use a shaped calico buff in the drill press. The burnishing will harden the wax in the blend; creating a harder and more attractive surface finish. It also ‘feels’ more finished; mineral oil alone still feels a little oily for the first uses, as it never really cures.
Once burnished they’re pretty much ready to rock. Re-fitting all the hardware is pretty straightforward; the only real curly part here is the washers on the lever handle. It’s a sung fit with no space for fingers and the upright position as is, has gravity working against us. We do have the luxury of turning the thing sideways, placing a washer on one upright and balancing another washer on the handle then trying to slide it all together. This would work. Might be a little frustrating but it would come together. Instead I’m using a trick I learnt from an old fitter and turner. Use some sticky lubricant to hold the washer in place while the thing gets fitted off. For things like steel or other metals, silicone grease works pretty well. For this application I’m just throwing a dab of the blended finish on to hold it together temporarily.
Stick a washer to each side, slide it into place and use the bolt to tie it all together. Works well.
The assembled presses look great and move really smoothly. I was reasonably happy with how they worked; though after using it on a couple of different things, I decided to make some alterations and improvement to the piece. If you’re looking at building something like this or are just curious, checkout the follow up article for what I changed and why. Otherwise, why not take a peek at how it works and some of the recipes I’ve tried out with it.

Too bad this is nacho meal
Thanks for reading, thatsalsa got … I’ll show myself out.
Kind Regards
Walker
July 2021
If you liked this article why not stay up to date with all the latest from Timber Tone. Click here to subscribe so you never miss a post or video.




Comments