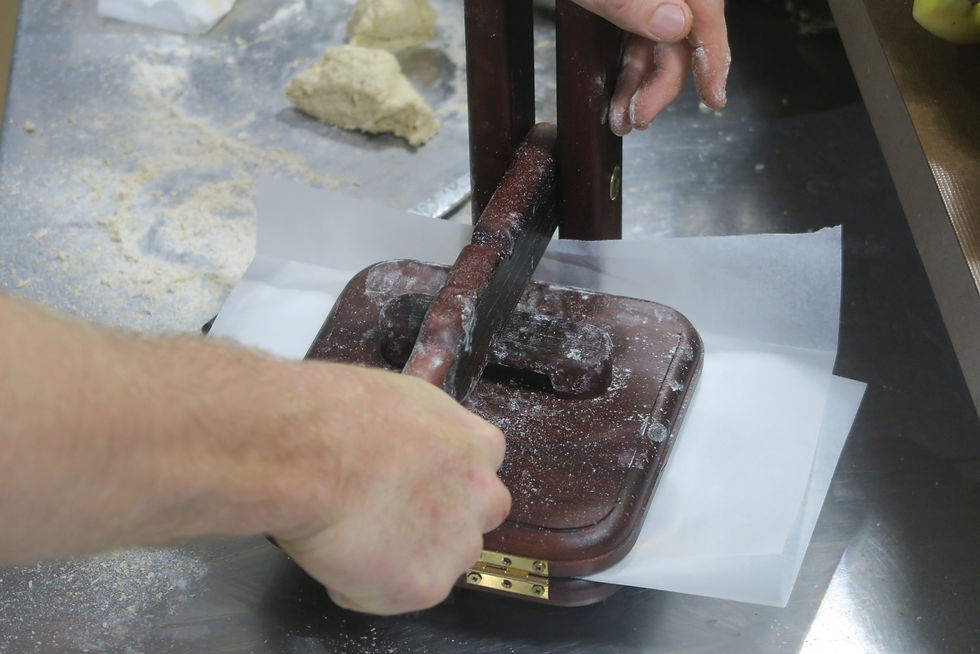
This article follows the tortilla press part 1 build; for better context of below, best check it out first.
The original press worked pretty well and I used it on a variety of occasions and recipes. Having this practical knowledge of it in action identified a couple of areas for improvement. These ended up being some of the things I was unsure of during the original build; so it’s great that they got answered, sucks that my unexperienced choices weren’t perfect. Anyways, live and learn. Striking while the iron was hot, I got stuck straight back into making the alterations before the momentum of the project ground to a halt.

Was a short but good (enough) run
The changes I want to make relate to the lid depthing and handle. These changes mean the easiest solution to implement them, is to re-make the lid in its entirety. There was a reasonable amount of fascia board left over so I guess we’re back to the pile.

In regards to the depthing; I’m just going to remove this. The effort involved was not worth the results. The doughs have a bit of spring, so once released the tortillas end up a little thicker than than I had wanted. I tested this out by shimming out the depthing with various doughs and comparing the results. So end of story, don’t waste your time including it; just leave the faces flat. Brother-in-law was right on this one.
For the handle, there’s a bit more to this. The lid handle also acts as the receiving plate for the compression force from the main lever handle. My original decision on placement here tried to get the best of all worlds. It was fitted closer to the centre of the lid to try and compensate for the grain orientation of the top, while providing a strong fix for the hinge screws. This way sends the compression force of the press through the weaker aspect of the material; the more centred handle position was to try and mitigate this and get a nice happy medium. It did work as a happy medium but missed out on optimal results. In this instance, maximising the leverage for the compression force proved the best way. I tested this out using a wedge as the landing for the lever. This allowed different heights and locations to be tried out and ended up settling on same height as current but basically all the way towards the lever.
The new handle location presents issues for the current grain orientation. Leaving it as-is, while increasing the leverage would definitely be stretching the friendship for the material. I expect it would fail (snap) along the grain eventually. The only remedy is to rotate it 90°, leaving the hinge fixers into the endgrain; not ideal but not insurmountable.
The original handles also had a finger recess on both sides. Over the usage, I found I was only ever going for the outside one; so a single recess is really all that’s required. To match the new lid orientation though, this recess has to be formed on the endgrain, a pain. So we’re needing a handle that fits into the new position, matches the grain orientation, is able to be machined safely while still looking aesthetically neat and pleasing. This is what I came up with.

Note the ‘horizontal’ crossways direction of the original and ‘vertical’ longways direction of the new lid grain
If you’re not particularly familiar with the material properties of timber; you’ll just have to take my word that working the end-grain can be tricky, delicate and fickle. To add to the difficulty, these pieces are small and the shape-to-grain direction doesn’t particularly lend itself to ease of working. I’m going to be using a machine, a router table, to make the recess and apply the edge treatments for the handles. I’m also quite fond of my digits so the only way to make sure they stay in-tact during this is to knock up a holding jig.
Screwed through the board to the underside of the handle, this jig proved handy to rough out the recess. Once shaped the handles get removed and the fixing holes will remain concealed as they are glued down. Applying the remaining edge treatments and cleaning up the machining by hand, the new handles get glued to the top. This thing is starting to look the business.

The last woodworking step is to mortice the hinges. As I mentioned before, these are now going into the end grain. For any modicum of success here your tools need to be sharp. I don’t mean ‘sharp’ like out of the box sharp; they need to be cutthroat razor sharp! Work towards the centre from both sides with a slightly upward angle to take small parings of wood away. You really just have to nibble at this. Going in all ham-fisted and trying to smash it out with a mallet risks chipping out the opposing side to the blow.
Them shavings.
Last but most importantly, before the finish is applied, they need branding. I didn’t bother trying to get any photos of the process this time around. Focusing on the job at hand is always a good idea when you only get one crack at the title.

Please note the non-dicking of both maker’s marks
Slap some finish on there, same as last time, and affix the existing hinges to the new lid. I opted to fix re-fix the hinges with the original screws. They’re a light gauge but we’ll see how they hold up. Pre-drilling to the absolutely correct size for the fixing screws is crucial here when fixing the hinges; otherwise you risk splitting the lid when driving the screw home. With the two lid faces both fully flat, I sandwiched a piece of sheet metal 0.5mm (0.019”) thick as a bit of a buffer while clamping and fixing the hinges. This gap is practically nothing but will stop the faces not meeting over time if the boards move slightly.

Bewdy; pack it up boys.
After a little bit more use, and perhaps he who shall remain un-named someone being a bit rough on the gear, we had a blowout. I had feared it may happen fixing the end grain this way but whaddyado. It’s not great but it’s also not un-salvageable. One of the screws cracked the top, causing the other to shear. After taking the lid off, there’s also another small crack on the left most side.
*groan*
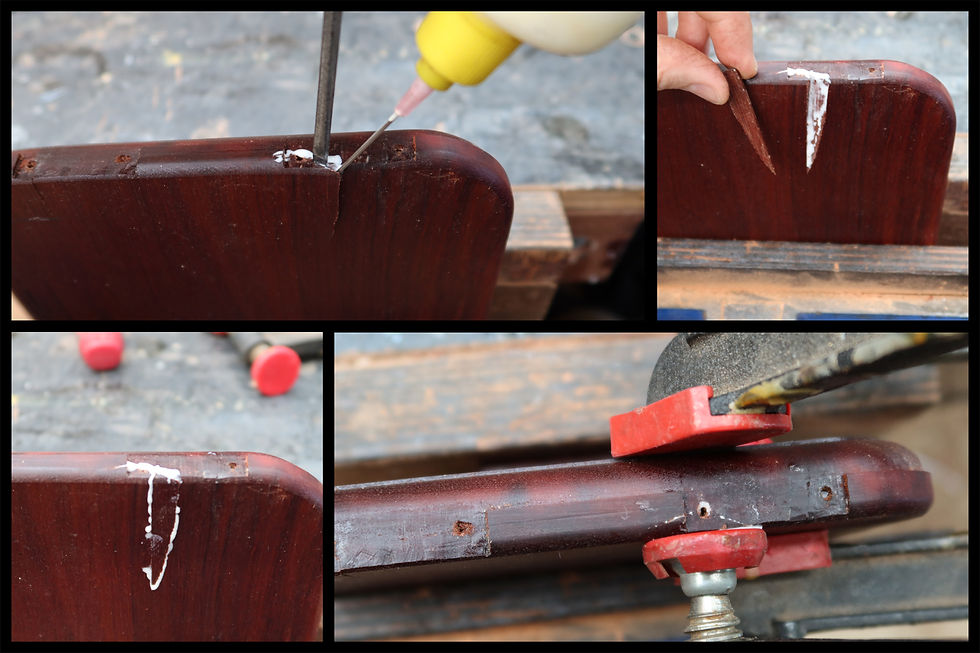
Best way to fix this is injecting more glue into the area and working it down/in as far as possible. I have an old oiling bottle that came with a needle end for dripping oil on harder to reach parts. Once empty, I refilled it with glue for just this purpose. Get a chisel or a wedge to separate the crack a bit more and get the needle tip in as far as it goes, to inject some glue. Remove the chisel and needle, then compress and release the area with your hand a dozen or so times. Then just keep repeating this. The glue will slowly start to spread into the joint and you will notice it further along the edges each time. I ended up splitting part of the chip off completely here; even better. Work as much glue into the remaining crack and then glue up the chip; it has the benefit of being perfectly sized to go back into the spot. Clamp & wait, then inspect your handiwork once the glue has dried. A quick cleanup with a scraper makes it (almost) seamless.

A multitude of sins, hiding in plain sight
To re-mount the top I’m going to use larger gauge screws. They won’t look perfect but at this point form is going to have to follow function. To be fair, unless you’re really looking for it, they won’t stand out much at all. We’ve also got the existing screw holes to deal with. I’m going to move the new holes slightly which means the existing centres are no good. To get this to work this we’ve got to fill the current holes to provide enough timber to centre the new holes. Best thing to fill them with is more wood. Take some of the waste and saw a veneer section then split this down the grain for some little sticks and wedges.
Start pumping the existing holes with glue from the needle dripper and work in one of the straight sticks. Tap it gently home with a mallet then keep tapping until is basically breaks off at the surface. Now start one of the wedges in the hole and tap it home with the mallet. Things should be getting pretty tight now. Again, keep tapping until it breaks off. Grab a pin punch the same diameter as the screw shaft, add a little more glue with a tiny shard of material and use the punch to drive it all in quite firm. Repeat the steps until the hole has been refilled. The glue will go off and this will have enough meat to partially hold a screw thread.

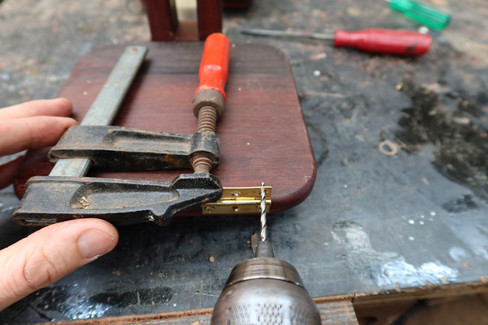
For re-screwing the hinges, there’s two things to change. Some of the hinge material is going to get cleared out to move the screws up, more centrally in the material, and the screws are going to get skewed in. Moving them up means they’re closer to the centre of the top board. Skewing them changes the angle to the grain; such that they aren’t trying to directly separate the wood fibres as they tighten up. I didn’t exercise a lot of finesse here. The brass is soft so just get the jobber drill in there and chew it up. Again, it is absolutely vital to get the pre-drill size right here; too small and the thing is going to split. Add some grease to the holes to help the screws drive in easily & don’t over-torque.
Yeah lookit, RAGs woodworking just hit town
Overall I’m happy with how the Mk II turned out and operates. If I were to build another of these, or you wanted to give it a go, I think this general design is good for the most part but some notes;
I would probably drop the height of the uprights by around 50mm (2”), not too far. I have found that I tend to hold down on these while using the press with my other hand as the bench gets quite slippery with flour everywhere.
From above; either re-position the cross tie lower, under the handle with the back edge notched to suit or omit completely. As the height lowers there is less chance of these moving. I did find that the cross tie allowed the resistance of the handle motion to be adjusted with the connector bolt by acting to stop the uprights moving in too much. This stops the handle falling down and slopping all over the place while still moving smoothly.
I have to admit I might have reamed the hinges out a but much. There’s really only a bee’s dick of material left in the corners and brass is quite a soft material; so time will tell whether these hold up. If the corners of the hinges do break, I think I’ll just re-adjust new hinges properly by relieving some space from the bottom holes also, to split the difference. Probably add a third screw aswell. Hinges are quick and easy but for a full re-build, I might re-imagine this part to a more robust arrangement; similar to the handle side.
There ended up being a fair bit to this one and I definitely spent more time than I thought I would; or should. To keep the two parts at a reasonable length, it felt like I had to skip over a fair bit of detail to make them a bit easier to get through. At the length they ended up, they definitely don’t need to be any longer. To bridge any gaps for you, I thought I might try out a bit of a montage with the photos. Not even 10% of the photos I take make it into an article so there was a heap of good shots to go from. I thought it ended up looking pretty neat;
If only the build took that long

Thanks for reading. Bringing this thing to completion ended up taking vastly more time than I had originally anticipated. I guess as time rolls on, the utility of the press will overshadow the effort spent and the time will slowly float away into the background. If you haven’t already, come and see how it works and a couple of the recipes I’ve slipped through it.
Kind Regards
Walker
July 2021
If you liked this article why not stay up to date with all the latest from Timber Tone. Click here to subscribe so you never miss a post or video.


Comments